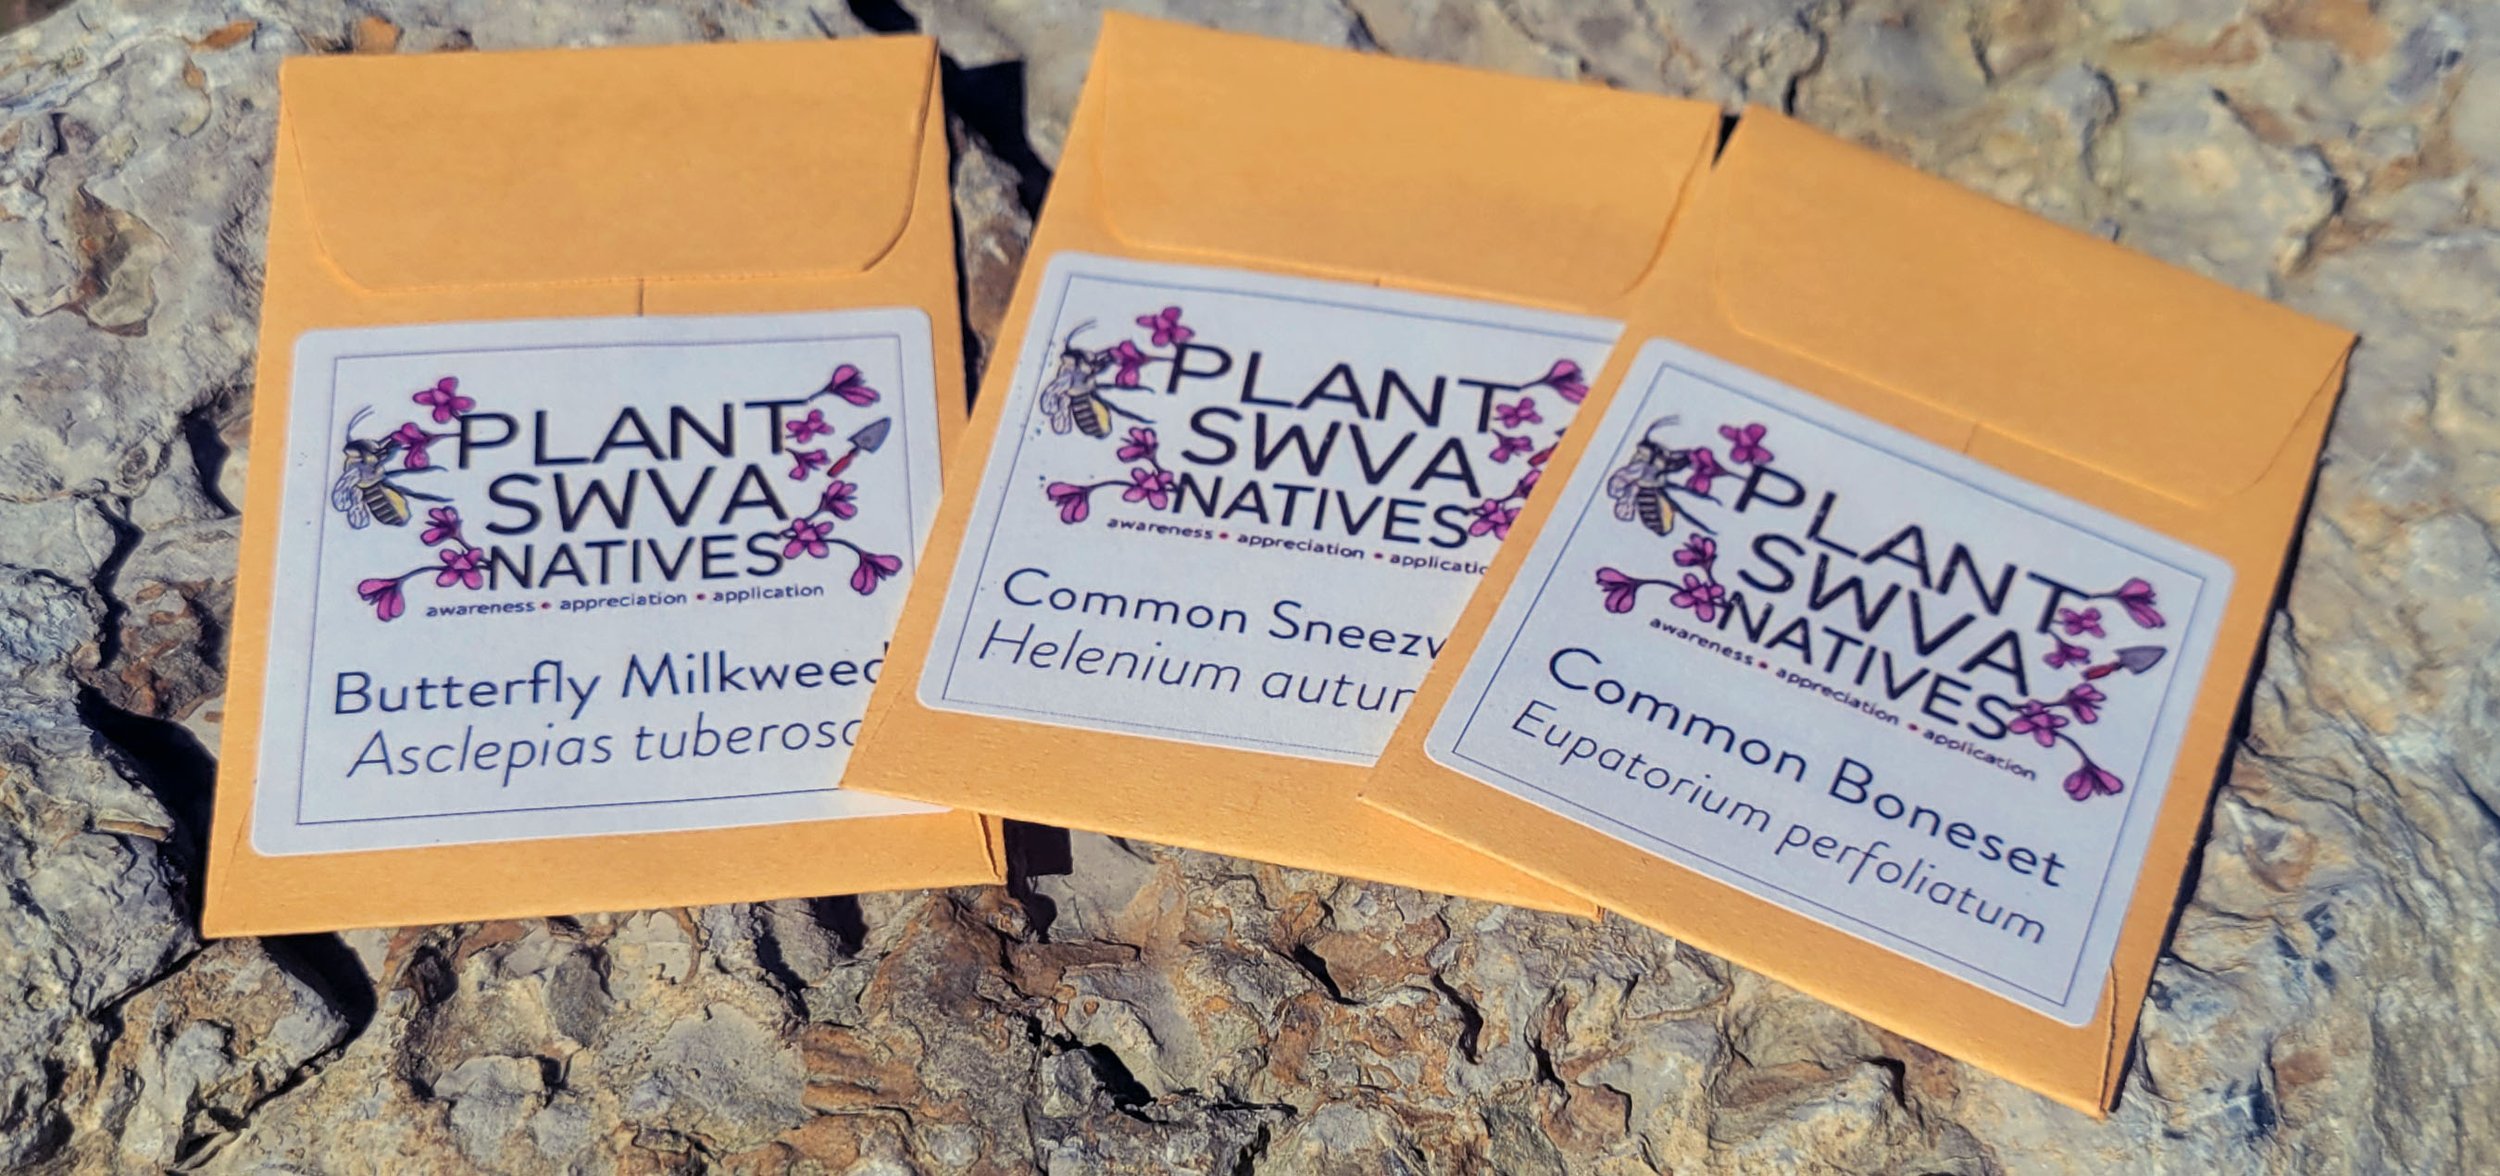
Plant SWVA Natives seeds are collected locally by volunteers from land we have permission to collect on. If you purchased a packet of seeds, thank you! Funds go back to community groups and non-profits working to better our land, in community, one native plant at a time.
If you have a project that is interested in free native plant seeds, please reach out to plantswvanatives@gmail.com.
Seed information
Our seed packets now contain QR codes which link to this page. You can match the common or scientific information with the row on the chart below to learn:
How to propagate your seeds. This is important because different seeds need different requirements in order to germinate. Many seeds are triggered by natures cycles and therefore need a period of warm or cold. More information on the chart. For more details about stratification see below.
What to expect from your seeds. Reminder that all of our plant information is generic. Bloom times, height, width, soil conditions, etc are approximate and on average. The best way to learn how a plant grows on your property is to go ahead a give it a try. Seeds are a low cost way to do that.
Seed Starting vocabulary
Best Planted in Early-Mid Fall: Seed requires 60 days warm stratification followed by 60 days cold moist stratification. Soak seeds in water for 24 hours. Place seeds in sandwich bag(s), with a bit of damp sand or vermiculite to keep moist. Keep at room temperature for about 60 days. Occasionally lightly spray water to keep seeds and sand moist. Put in the fridge for another 60 days. Best planted outdoors in fall.
Double Stratification (Two winters): Seeds need cold, moist period (winter) followed by a warm, moist period (summer) followed by a 2nd cold, moist period: Soak seeds in water overnight, plant outside in pots or a nursery bed, and wait until the second spring for germination. For faster results, mix seeds with horticultural-use medium, place mixture in a labeled, sealed, plastic bag and store in a warm place (about 80°F) for 60–90 days. Then place in your refrigerator (33–40°F) for 90 days before sowing.Germination should happen shortly after final sowing.
Hot Water Treatment: pour hot, non-boiling water over the seeds, and let them soak for 24 hours. After soaking, plant the seeds or proceed with cold stratification or planting.
Inoculum: Most legume species harbor beneficial bacteria called rhizobia on their roots. Genus-specific strains of this bacterium called inoculum can aid in the fixation of atmospheric nitrogen and improve long-term health of native plant communities. Inoculum is naturally occurring in most soils and additional amendments are not needed, but can be purchased. If you would like to use native soil, collect a small amount of biotic soil from your yard to mix in with the potting mix.
Scarification: These species require weakening of the seed coat in order to come out of dormancy. Scarify by rubbing seed between two sheets of medium-grit sandpaper. The goal is to abrade seed coats – stop if seeds are being crushed. Scarification should be done before stratification (Germination Code C) if needed. Fall or winter sown seed should not be scarified to prevent the chance of premature germination and winter kill.
Soil Prep: Soil should be level and compact. If you are using potting soil a seed starting mix, which has good drainage, is ideal. If you are planting in the landscape, make sure the area is a flat as possible and weed free. Seeding on a slope can limit success. Use a potting media with good drainage and small pieces, avoid potting soils that stay overly wet or have large pieces of bark and other materials. Soil to seed contact is important for germination. Push the soil down to remove air holes in the soil and prevent the seed from migrating away from the soils surface. The smaller the seed the closer to the surface you want it. With the smallest seed being planted on the service.
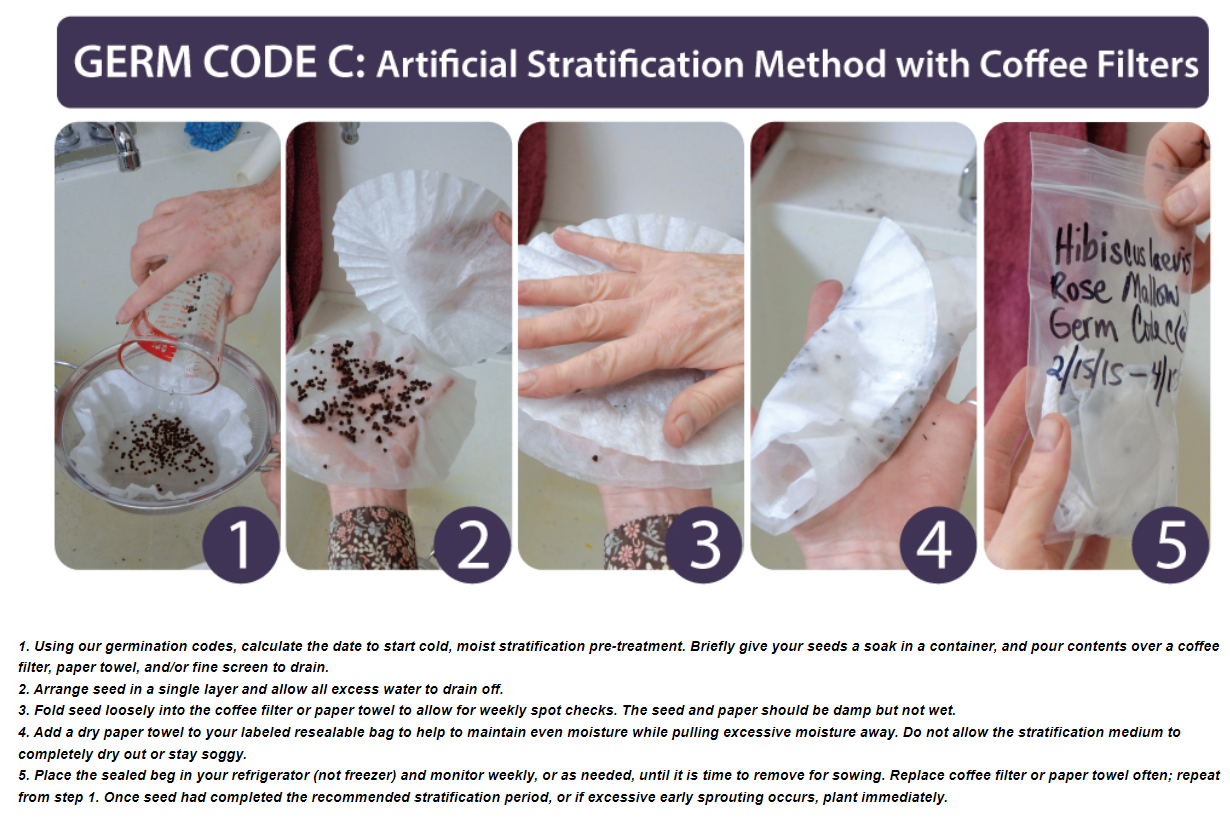
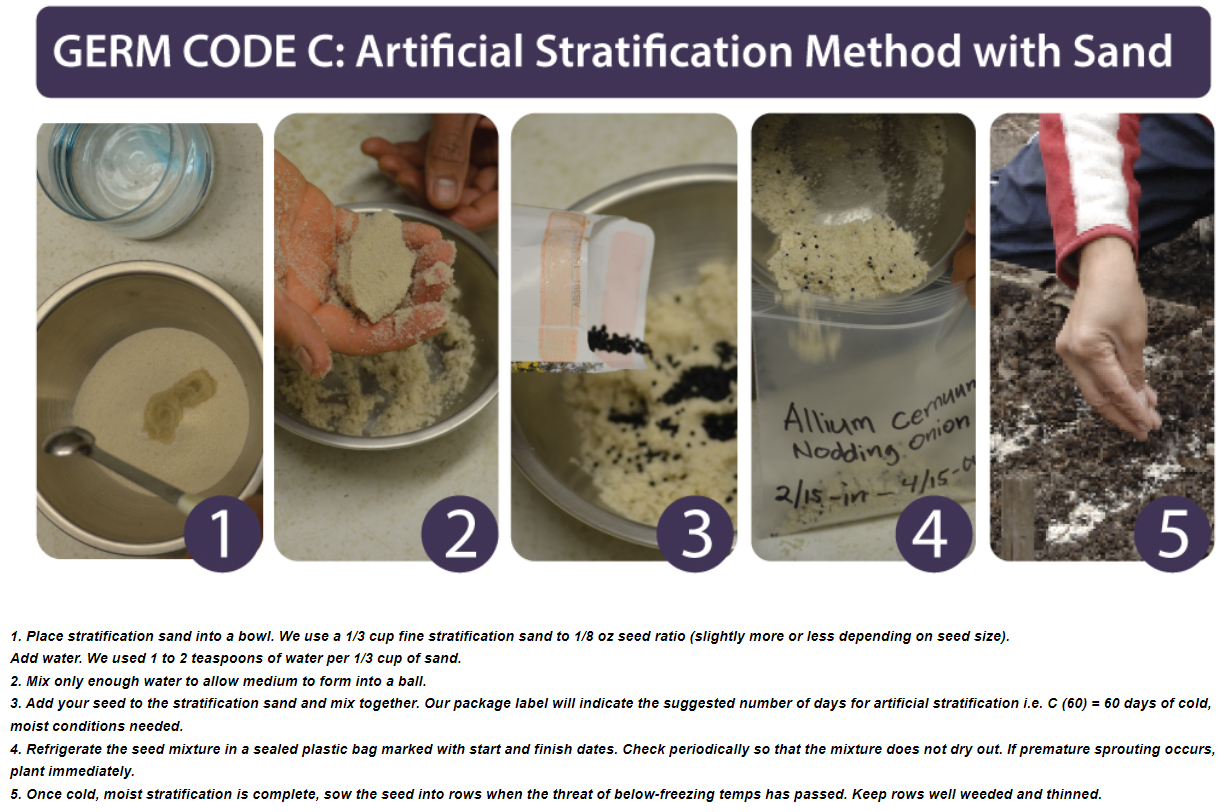
Stratification: Cold, moist stratification needed: To naturally stratify seed, surface sow outdoors late fall on a bare (weed-free), compact site and allow seed to overwinter. If you are new to perennial seed starting, this would be the preferred method. To artificially stratify seed, place seed and seed starting medium in a labeled, sealed plastic bag and store in a refrigerator (33-40°F). Seed starting medium could be a damp paper towel, coffee filter, sand, vermiculite, or other horticultural-use medium. We recommend mixing equal parts sand and seed, or slightly more sand than seed. Whatever stratifying medium you choose, be sure to moisten the mixture slowly to a damp, but not wet, consistency. You should not be able to squeeze any excess water out of the medium. We recommend mixing equal parts sand and seed, or slightly more sand than seed. Whatever stratifying medium you choose, be sure to moisten the mixture slowly to a damp, but not wet, consistency. You should not be able to squeeze any excess water out of the medium.
Surface-sow: Seeds are very small or need light to naturally break dormancy and germinate: Seed requiring this treatment should be surface-sown. No soil cover, or just a dusting of soil, should be applied. Do not let soil dry out until seedlings are established. Shading with a window screen set 12” above the soil during the first season will also help prevent drying. If sowing seeds in containers, water from the bottom as necessary or cover seed with a light layer of sand to help keep the seed in place.
how to stratify:
The stratification information below comes from Prairie Moon Nursery. You can learn more about germinating native seeds directly from their website. https://www.prairiemoon.com/how-to-germinate-native-seeds.html.
our seed program has been made possible through partnerships with the following organizations.